Affinage - This word is used in the cheese industry and comes from the Latin ad finis, meaning “towards the limit”. That would refer to taking the cheese to the limit of aging and maturing. The Affineur is the person who ages cheeses. However, the American Cheese Society uses
 |
| Sheep Milk Cheese Affinage |
the term "cheese ripening" as the domain within the body of knowledge, not affinage. Here in Canada, we embrace both multiculturalism and bilingualism nationally. We do not shy away from foodie terms in other languages and from other cultures such as shwarma, sushi, lasgna, or couscous, or the names of cheeses like Gouda, Feta and Manchego.
With only a few weeks to accomplish some result, I was thinking of hand-washed rinds and wheels of gouda turning around in vats of brine. I wasn't at all sure I knew what I was going to do! These hockey pucks were small and intimidating. I read instructions in various cheese making books about external salting and brining. However, there were no step-by-step instructions in these books on what to do with the cheese while it was ripening (ie flipping, temperature and humidity controls… the affinage part!!) So, I was left to my own devices.
After taking the sheep cheese home in a wet plastic
bag, I grouped the cheeses into four
sets for affinage:
1. Sea Salt Sheep by the Sea Shore Cheese
2. Black Salt Sheep Cheese
3. Red Sheep Cheese – one Paprika and one Herbed Paprika,
a play on Mouton Rouge
4. Forest Mushroom Sheep Cheese
Although I knew that salt had been added during the making
of the cheese, I thought I had to salt the cheese as a further step in affinage.
Ok, so still I'm learning!
After a few weeks, the results were rewarding and tasty. I felt successful and
gained an appreciation for cheese making not only as a craft, but also as an
art and as an economic contribution from simple homesteads to industrialized
processing. I feel encouraged to make more!
Here's what I started with:
Mats
I removed the cheese from the bag that contained whey and placed the cheese by group on sterilized bamboo sushi mats. To first sterilize the mats, I filled a casserole dish with hot water, dropped in the washed sushi mats and let it bake in the oven at 250F for 1/2 hour. The mats were cooled, then rinsed off to remove the bamboo-y odor.
The Cave
I cleaned out both crispers in the refrigerator with a bit of Javex and water to ensure a clean environment. This was odd because I thought that since the rest of the fridge is full of old moldy cheese and other "things that grow in the back of the shelf", I would need to prepare myself for a failed experiment. I mustered on.
In the dairy, there were drying rooms and mold rooms. The Wild Mold Room had a magnificent scent. thick with molds from various cheeses including blue (penicillium roqueforti). To contain my mold breeding, I used microperforated zip-lock plastic bags. The shushi mats fit just right into the bag. With two pucks on a mat, it would be easy to fold the mat over them for support during turning. However, the mats would need to sit separately and not one on top of the other as they were still draining for the first week. I had to wipe out the bag of extra whey during the first few days.
The fridge temperature was 38 F. That seemed a bit cool for mold growth but I had to rationalize that since my store-bought industrialized-made cheddar cheese would grow mold after a week, I was sure to get something growing from these sheep milk hockey pucks that were innoculated with penicillium candidum. However, the humidity on the fridge was too low. It was around 30%, Not good. I decided to use an open cup of water in each crisper drawer and to use extra plastic sheeting to ensure moisture could be controlled. I would know in about a week if mold would form in my affinangerie. Yes, I did indeed make that word up just now. How about Grotte Fromager ? Non?
Affinage Process
I salted a few of the pucks with Celtic Grey Salt to increase the umami flavours by adding more minerals. I also salted a few with Black Salt. Indian
black salt (kala namak) has a distinct sulphurous
odor and has healing qualities different than sea salt. I wanted to see if mold
would increase or be inhibited and perhaps make cheese even more digestible.
This was good in theory. I learned in the 2nd week of the experiment that salting the exterior further was unnecessary as the cheese had already been fully salted with the milk as part of the cheese making process. It was going to have some extra salty cheese.
This was good in theory. I learned in the 2nd week of the experiment that salting the exterior further was unnecessary as the cheese had already been fully salted with the milk as part of the cheese making process. It was going to have some extra salty cheese.
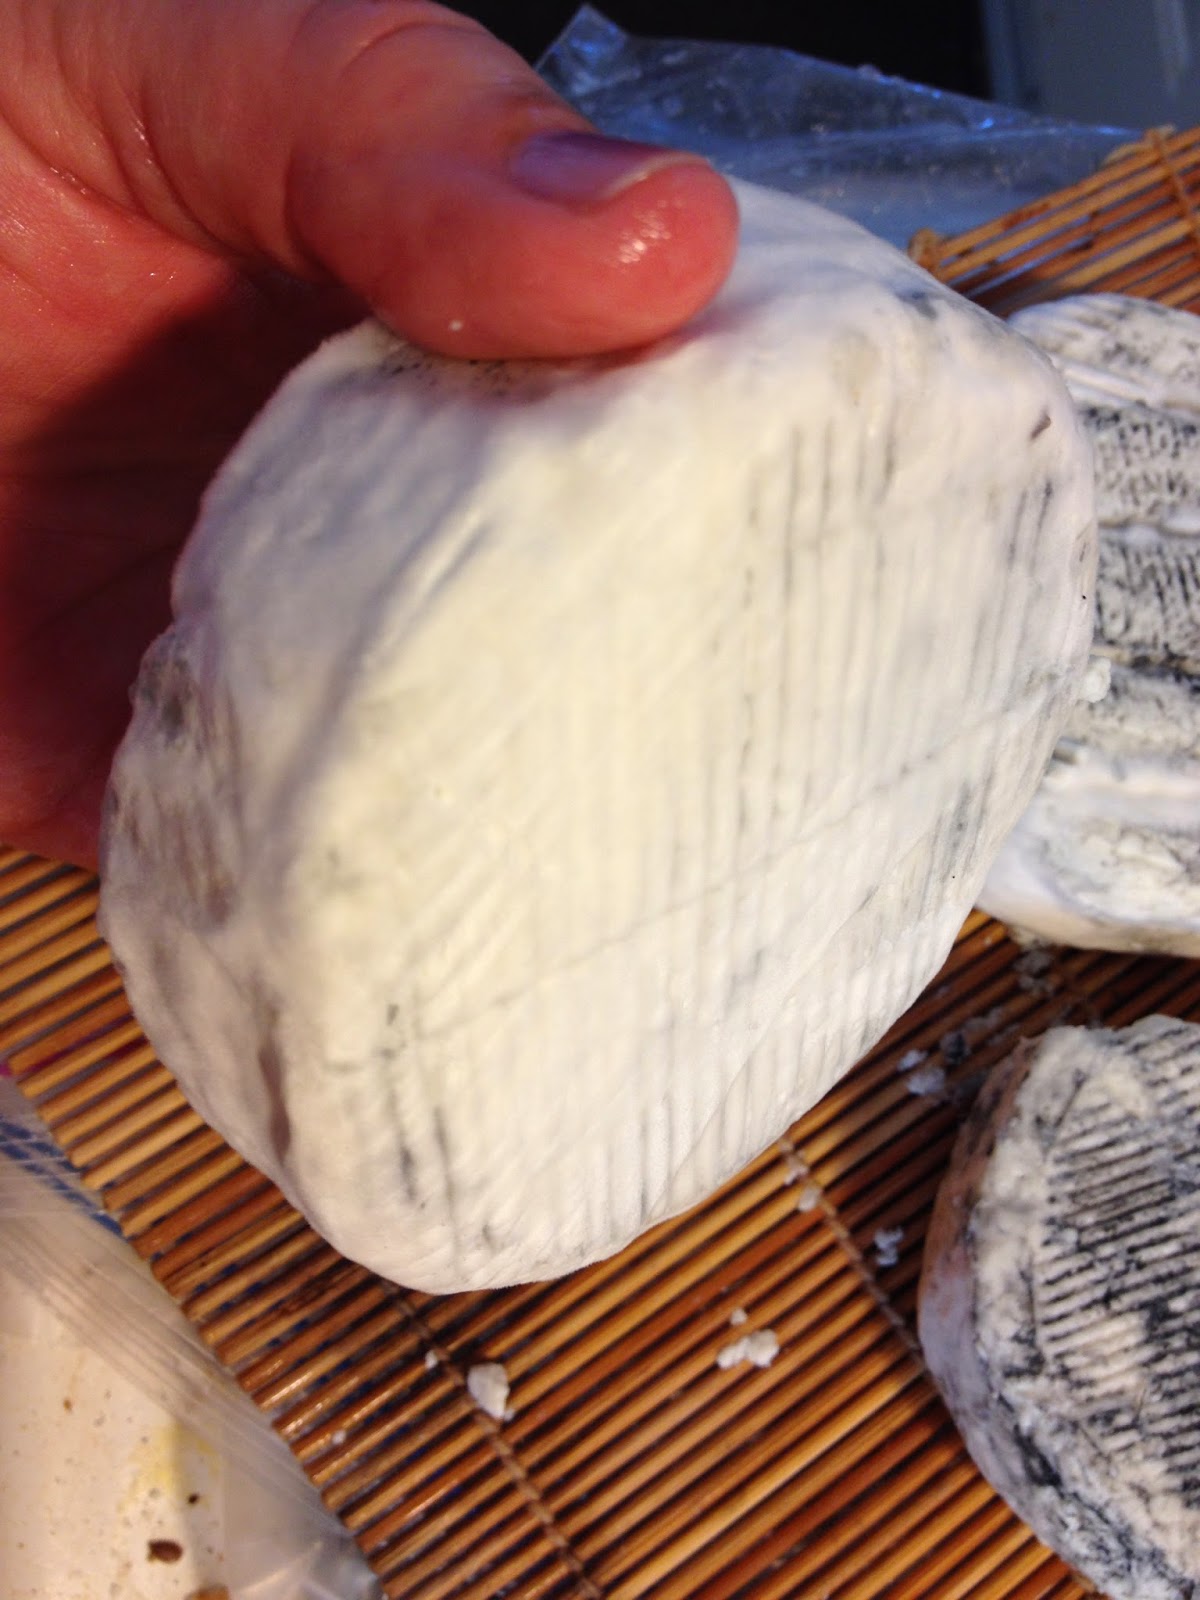
Here's what the cheese pucks looked like 1 week after being made at the Monforte dairy. See left side photo below. The black marks on the cheese are not grill marks. They are lines of ash that did not drip away with the whey from sitting on the wire racks in the drying room. Looks like I squished on of the pucks and kept one of the pieces to see if it would grow mold. It did!!
FROM THIS: TO THIS IN 5 WEEKS:
FROM THIS: TO THIS IN 5 WEEKS:


How awesome to find mold growing where it should after only a week! I felt like a trustee of an ancient ritual. I talked to my cheese and took it out to warm up for about 10 minutes a day, enough to take the chill off. Enough to be friends with The Mold. Looks like Brie doesn't it?
FROM THIS: TO THIS IN 5 WEEKS:


Forest Mushroom Affinage
I took a dried Shitake mushroom and grated it over the cheese and added a sprinkle of sea salt. It didn't retain its flavour, so I think it would be better to add it to the milk before ripening.
FROM THIS: TO THIS IN 5 WEEKS:

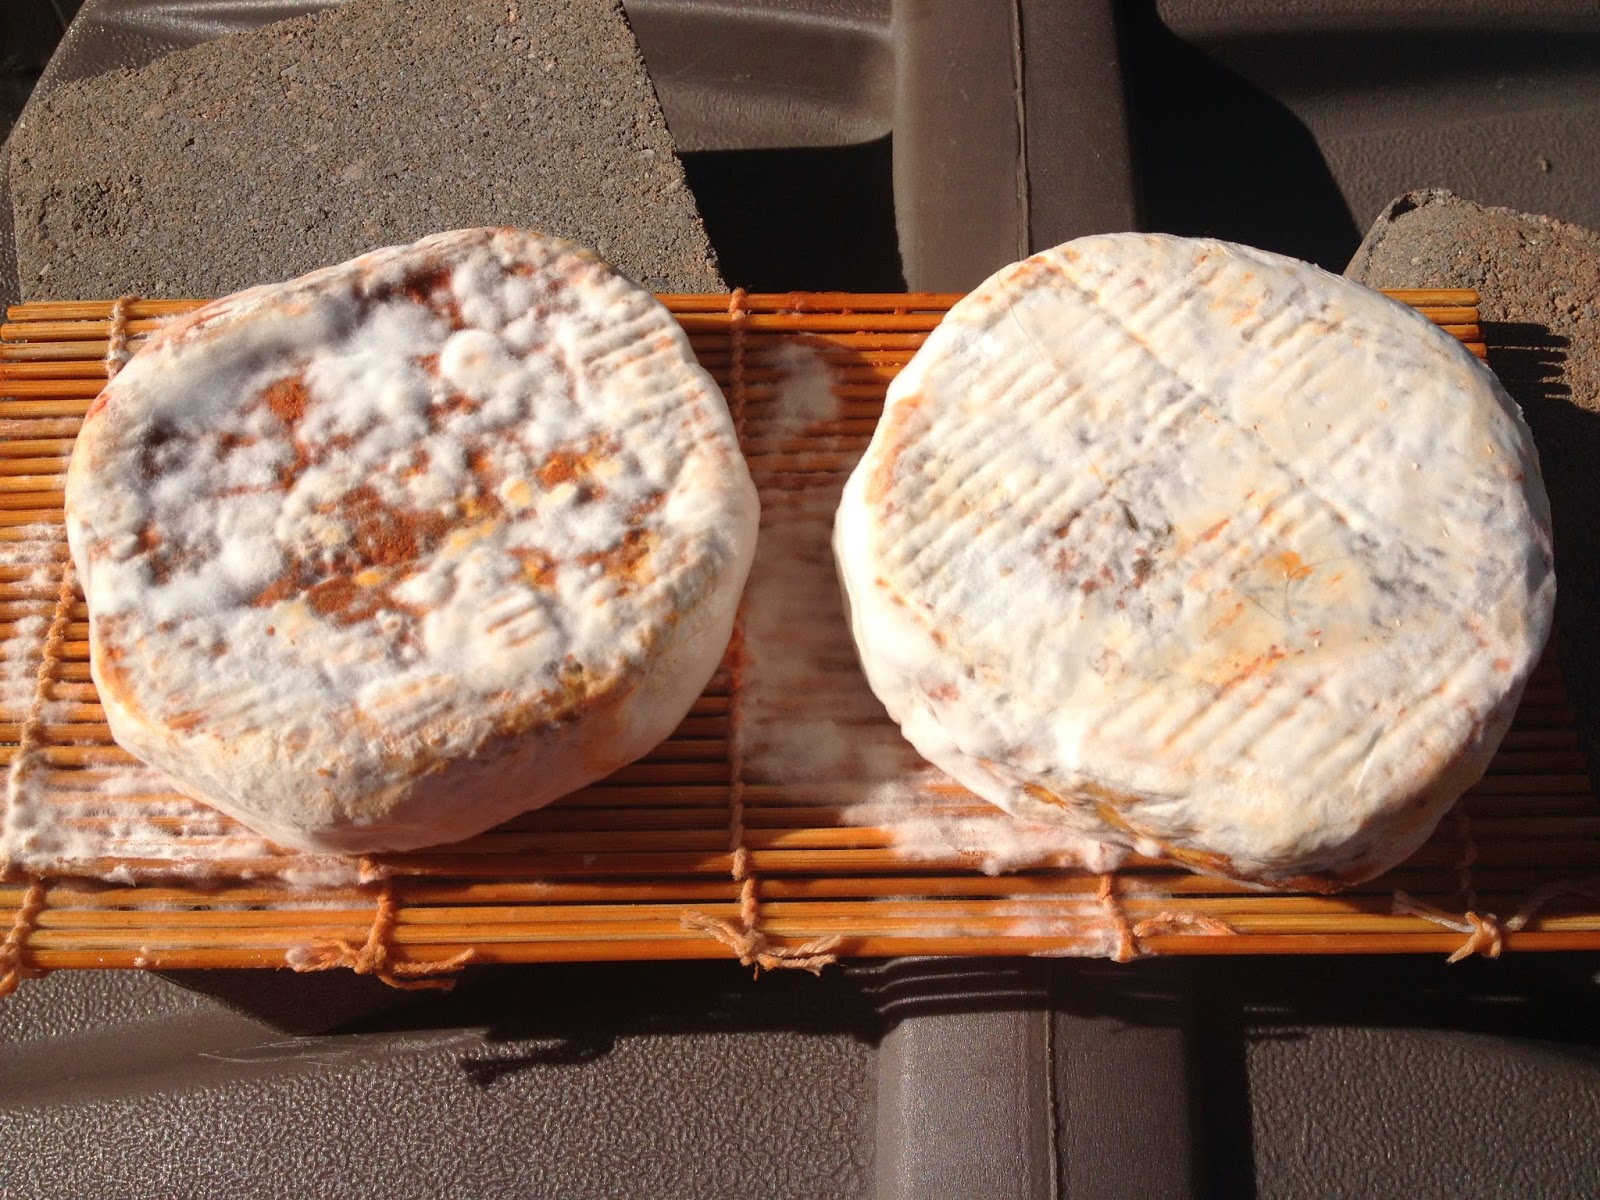
Paprika Rubbed Cheese
I mixed 2 Tbsp. paprika with 2 Tbsp Extra Virgin olive oil and 1/2 tsp salt to provide a lift to the otherwise flat paprika. The mixture sat a few minutes for the oil to absorb the colour of the paprika. For a separate herbed mix, I added 1 Tbsp. fresh thyme to the oil batch and muddled it a bit to release the essential oils into the olive oil carrier. I spread the mixture over the top and bottom liberally and less on the sides.
 |
| Paprika Rub - Left side, Thyme Rub |
 |
| Paprika Rub Mold Growth |
 |
| Finished Red Sheep Cheese after 5 weeks |
 |
| Red Sheep Cheese after 8 weeks |
I think the Red Sheep Cheese was the most successful. The olive oil seeped into the paste and turned it to a light tan colour. The rind was thin enough but you could still see a layer of the paprika. However, the best taste was the Red Cheese with Thyme. It was more savory than the plain paprika rub that tasted like Camembert. I learned that I should have continued to monitor the cheese, unwrap and turn the remaining cheese periodically. I would not push the 8-week old cheese past this point and will consume it quickly now. So, I guess I am have earned one peg towards being an Affineur because I did indeed take the cheese ripening to the limit.
No comments:
Post a Comment